Step 7b- Add Gravel, Vapor Barrier, and Rebar
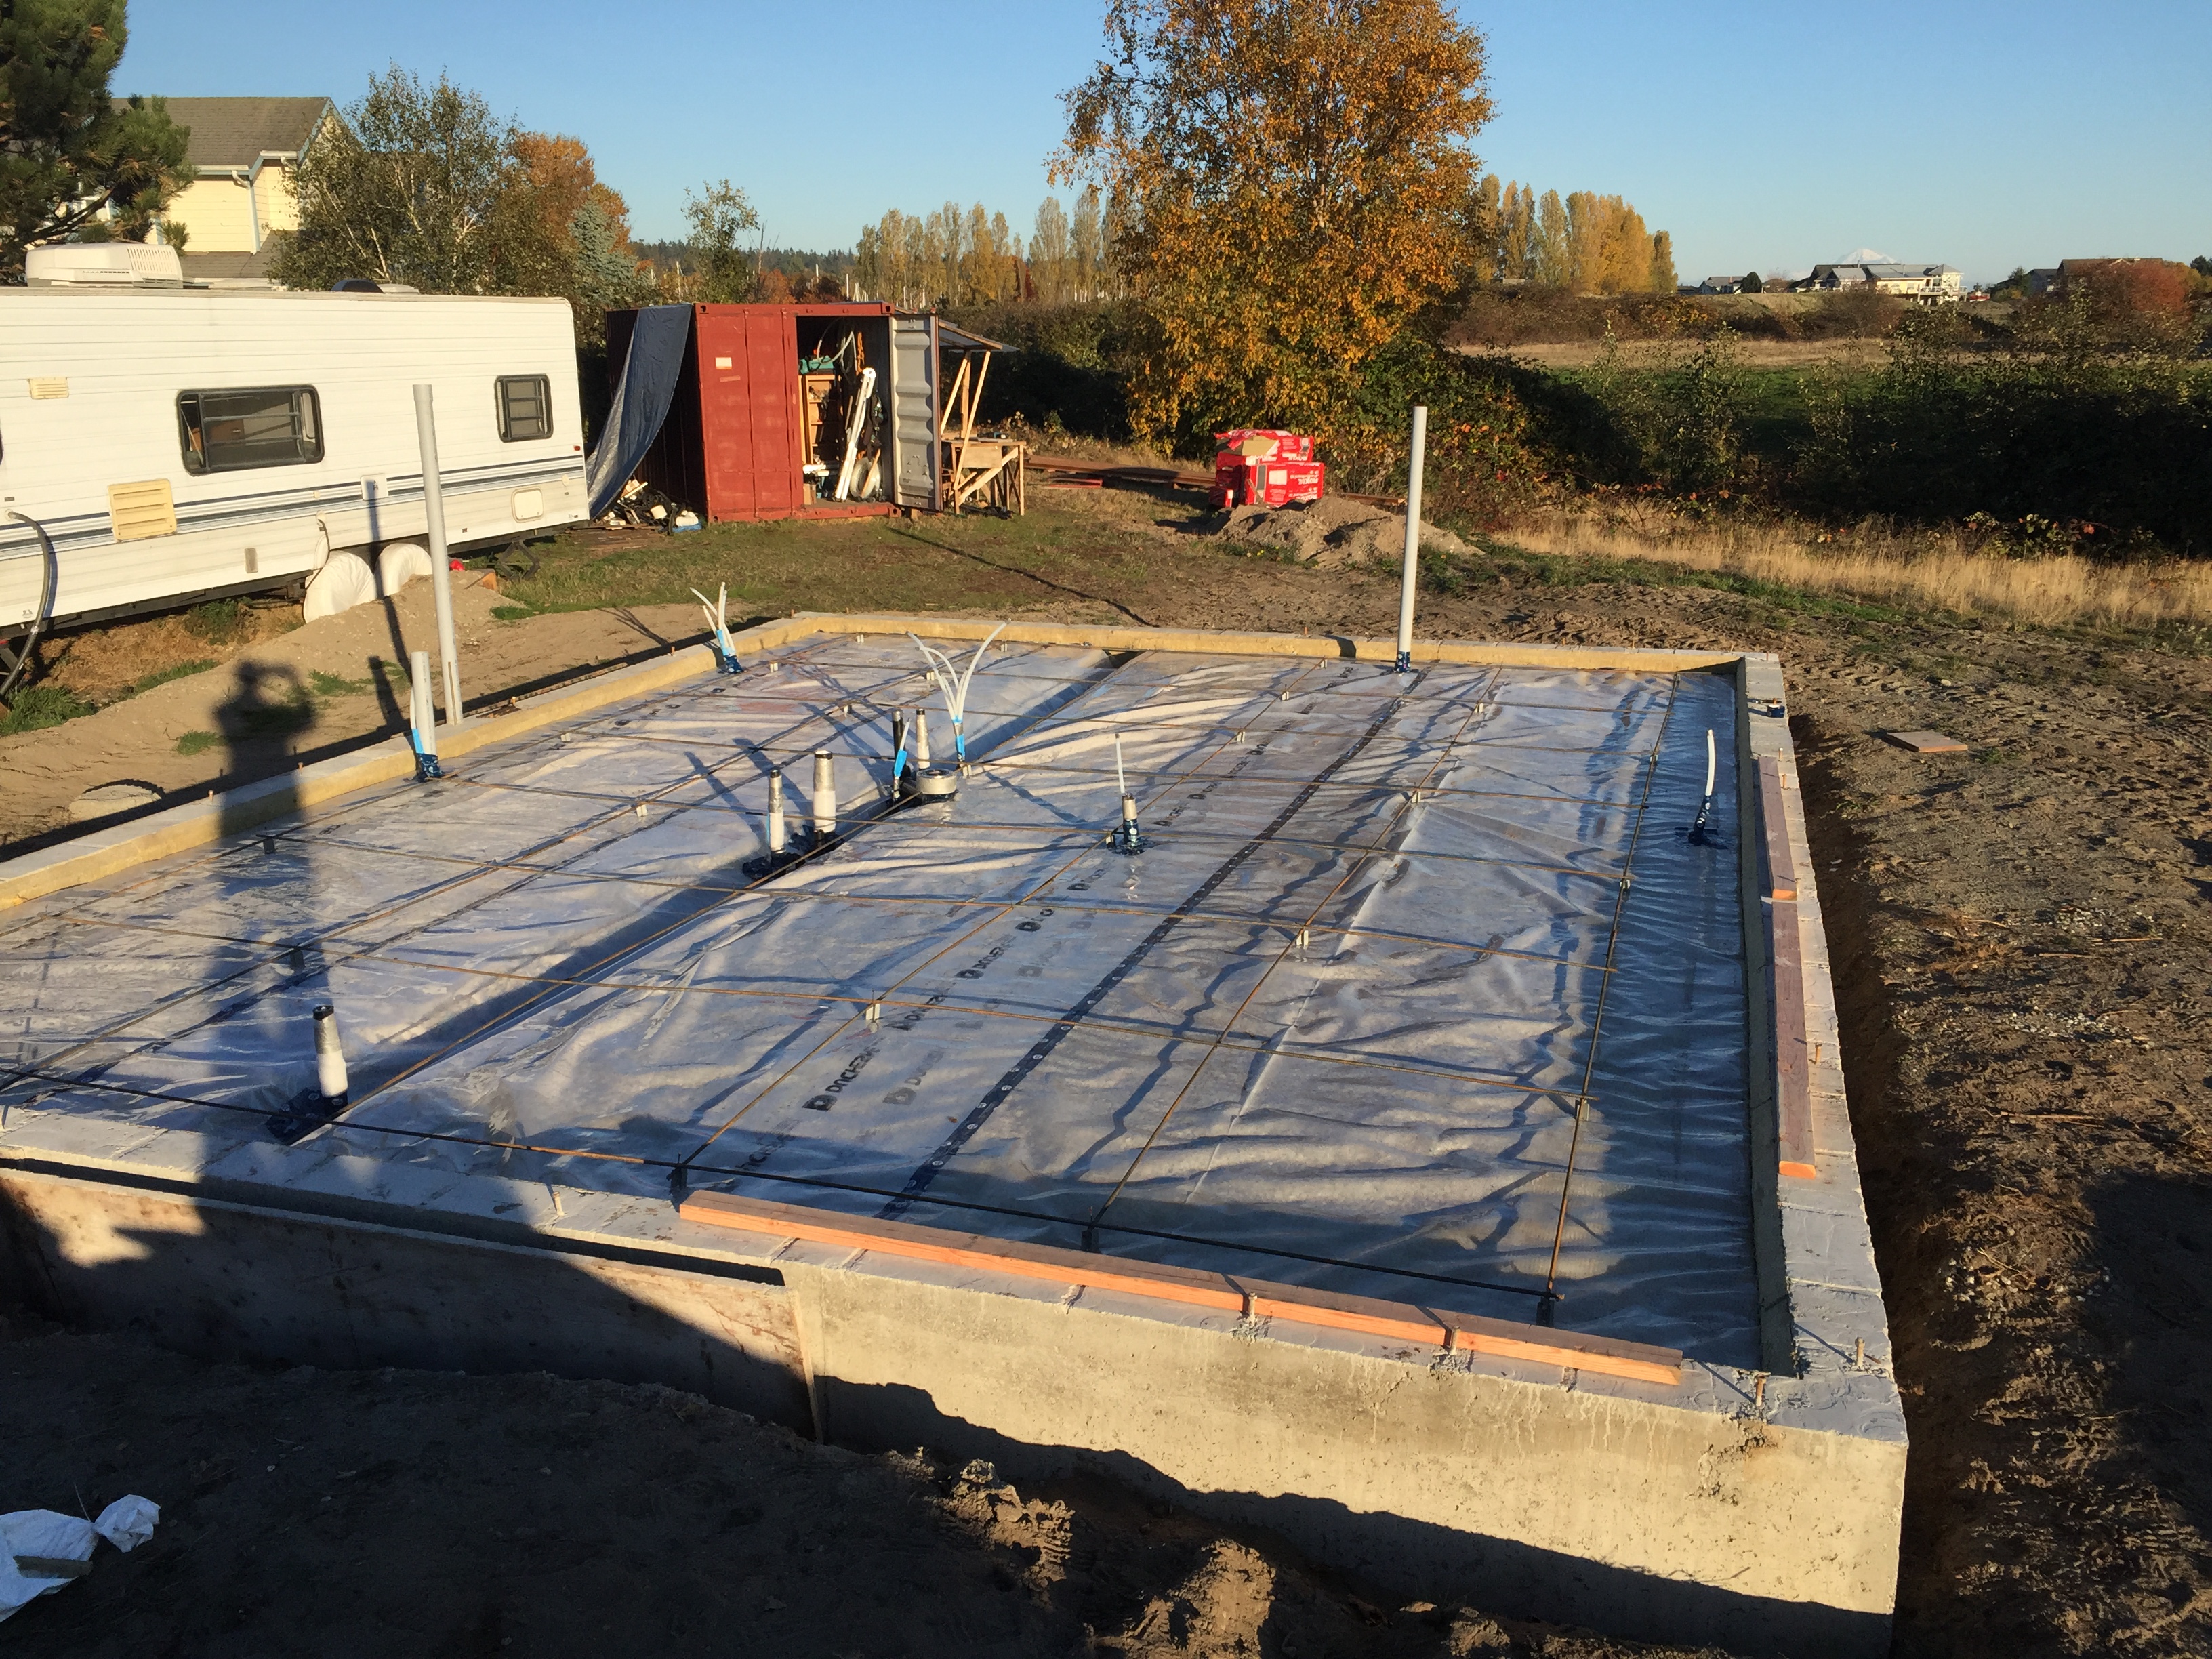
Capillary forces are very powerful. Have you ever been to a redwood forest and wondered how water gets from the roots to the leaves at the very top of the tree? The answer is capillary force, and surprisingly, it works even more efficiently in concrete than it does in trees! Scientists believe concrete has such powerful capillary force that it theoretically has the ability to drive water 6 miles upward against the force of gravity. Wood maxes out at about 400 feet which is why you don’t see any trees get that high. In an effort to curb these powerful forces, building codes require that a layer of gravel and a vapor barrier be placed underneath the concrete slab. The gravel drains away any standing water, and the vapor barrier takes care of any water vapor. 
As you can see above, I have started adding the gravel layer inside my footing. The long 2×12 boards act as barriers to prevent the gravel from occupying the “shovel footing” that is necessary to support the bearing wall that will soon be framed directly above it. Once all the gravel has been added and compacted, the boards will be removed and a 12″ wide and 8″ deep ditch will be left behind. It is much easier to create the ditch this way rather than shovel the gravel out. When we pour the concrete for the slab, the concrete will flow into this ditch and the slab will be 8″ thicker along that line, giving added support to the bearing wall. If you aren’t aware, a bearing wall means that it is supporting some of the weight of the house. The entire roof of the house is supported on only two exterior walls, so none of the interior second story walls have any weight to carry. I could have supported the weight of the floor joists between the first and second stories in the same way, but I would have had to use special engineered I-Joists. Instead, it was much easier to use two lengths of 2×12 joists and have them meet on top of one of the first story interior walls. This wall is the bearing wall.

After all of the gravel had been added, I leveled it out and then installed the horizontal layer of Roxul as you can see above. Keep in mind that the more insulation added now, the lower the heating bill will be in the future. Investing an extra $300 now will quickly pay off in a year or two, and then I will reap the benefits every year after that for the life of the house. Once the insulation was added, I ran a plate compactor around everywhere to ensure the gravel was well compacted. Then I pulled out the long 2x12s to create the shovel footing as you can see below.

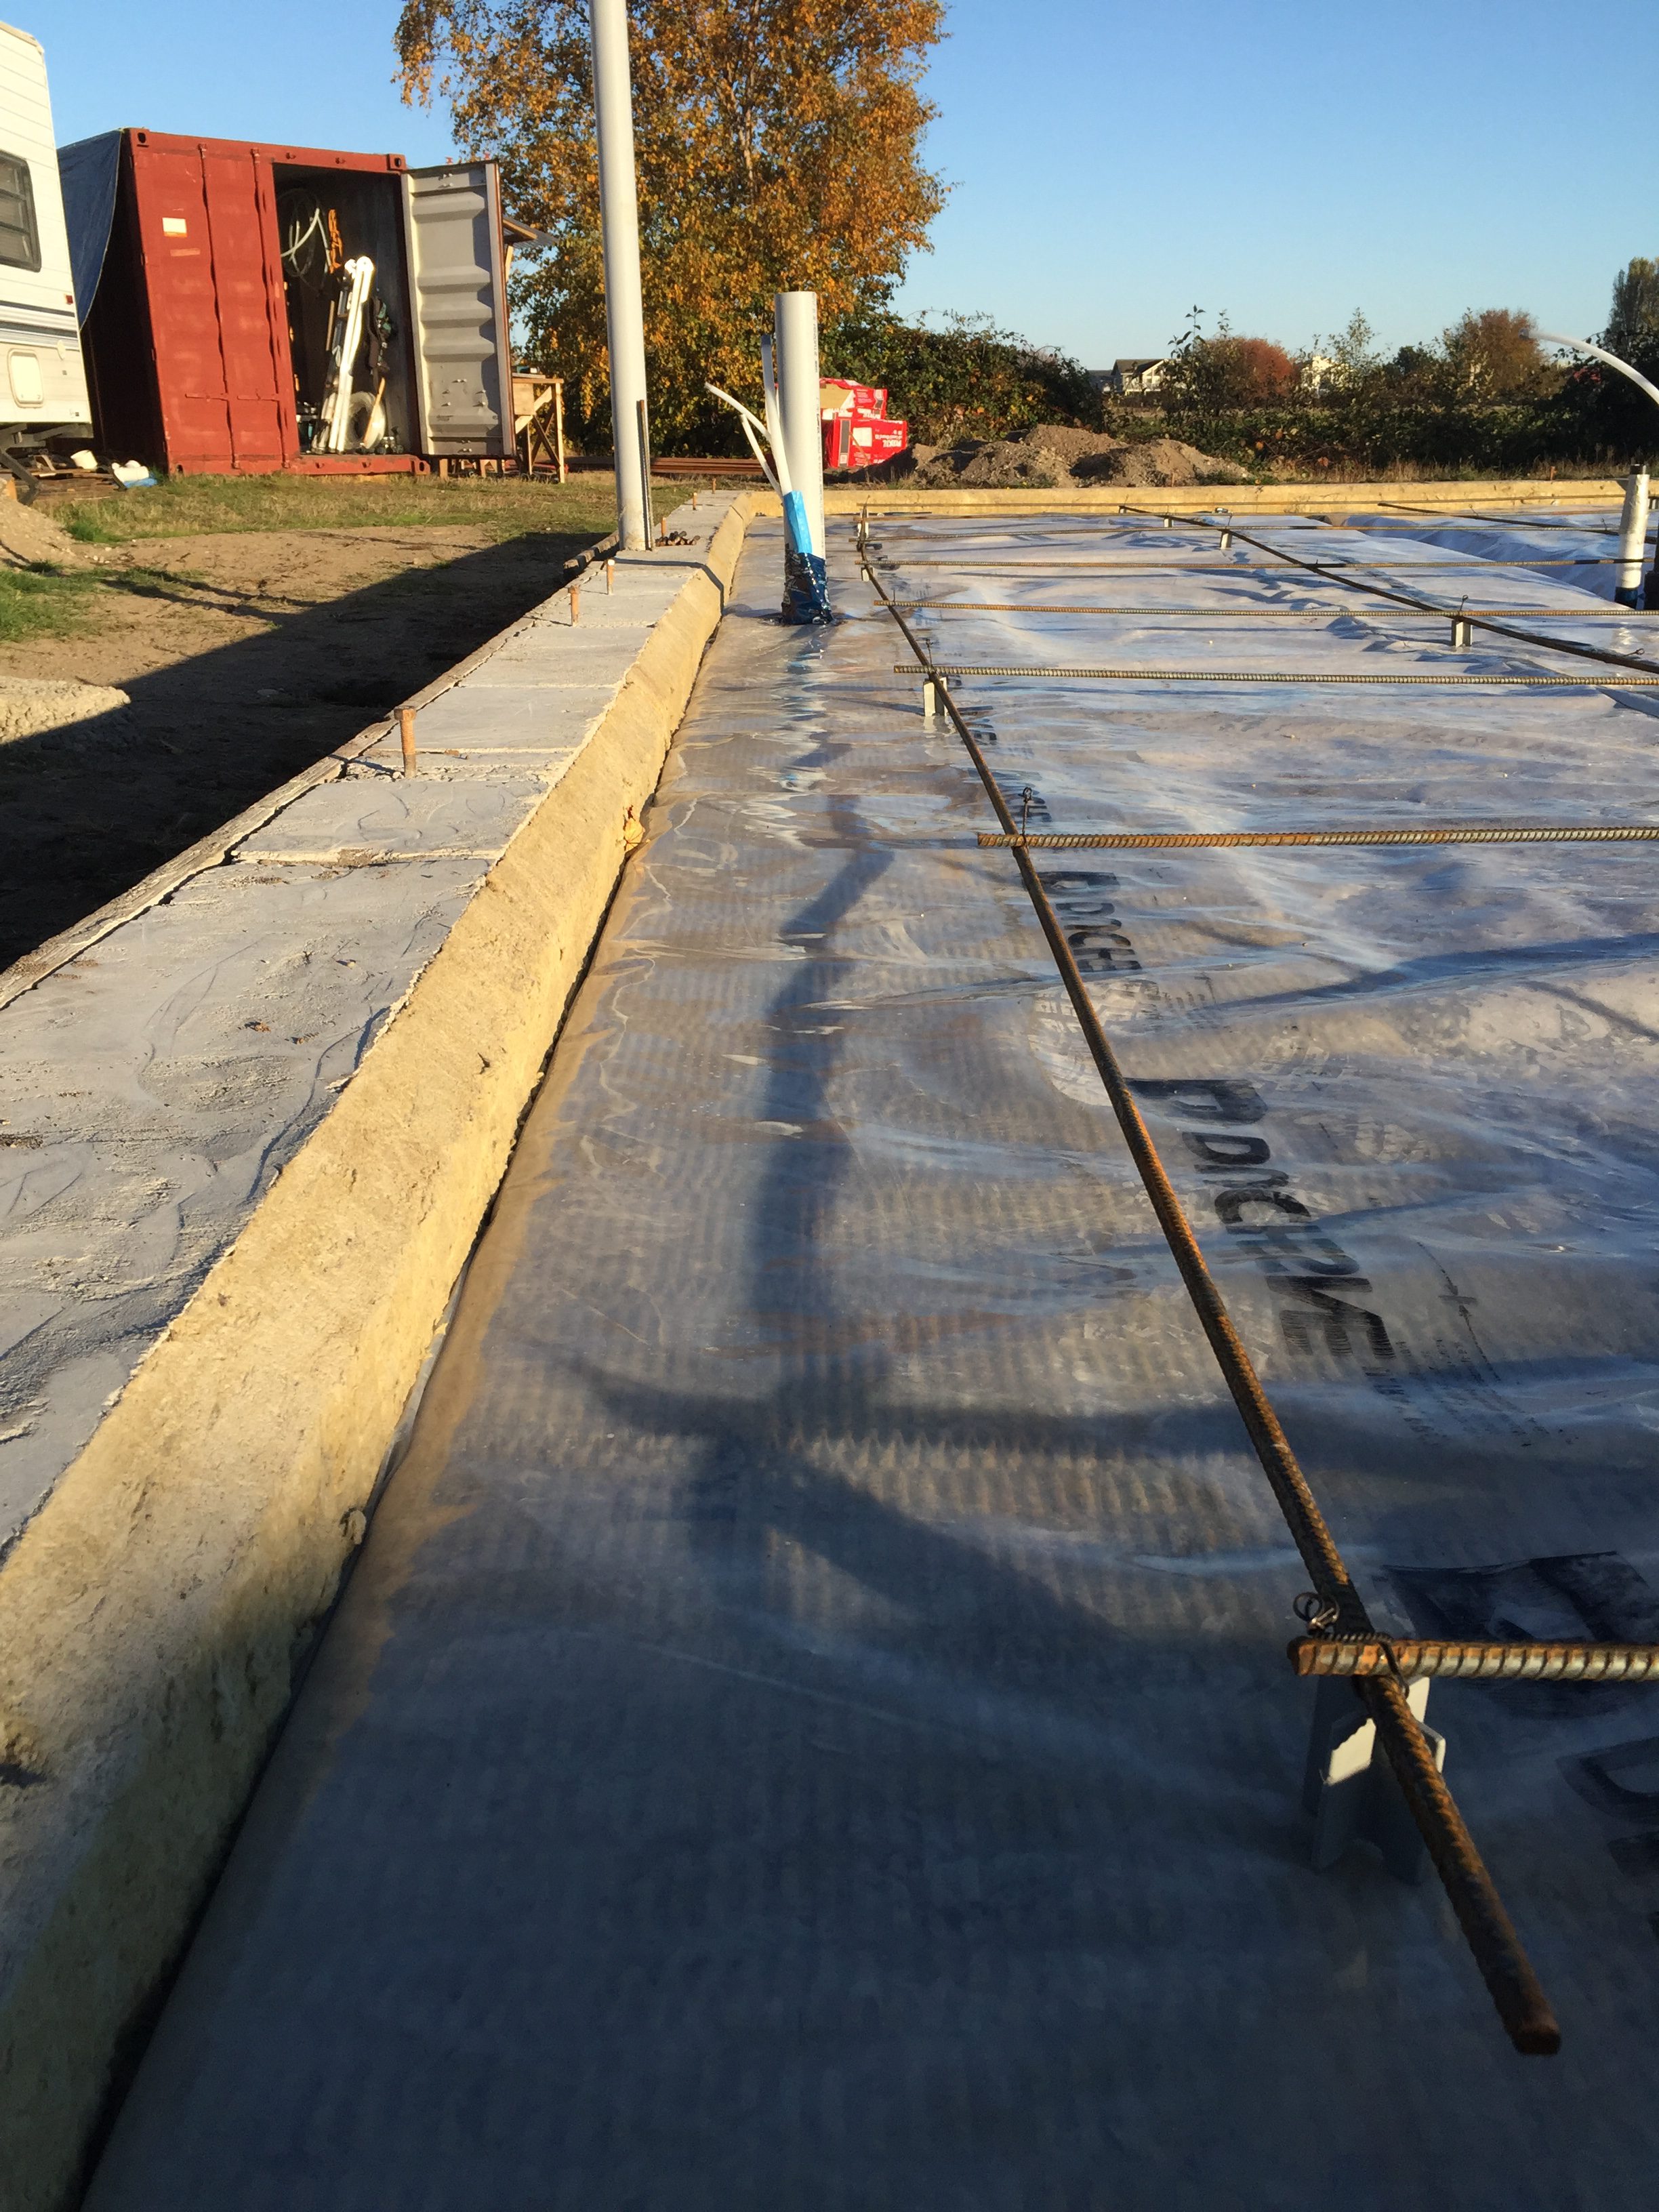
The last steps were to add the vapor barrier and rebar. The vapor barrier comes in a large roll so it was simply a matter of rolling it out and cutting it to fit. Wherever a pipe penetrated I used vapor barrier tape to seal the hole. I tucked all the edges of the barrier in between the two layers of insulation. The rebar I lined up in a neat, four foot grid and set it on 2″ chairs so it would end up right in the middle of the 4″ slab.

Very helpful information! One thing I wonder about is replacing pipes in this type of foundation. I just had to replace an old pipe under the house with effluent to the sewer pipe. Would something like that be possible with this type of foundation? Thanks.
I will provide an answer but bear in mind that I am probably not the best person to ask. Your question is much better directed to an expert and my answer is based solely on my research and not on experience. However, I’m quite confident that replacement of a pipe in concrete is possible. There are very few things in construction that are impossible to repair. You would have to chip away or jackhammer the concrete little by little until you get to the pipe and then keep chipping around it like an archaeologist. You bring up a valid concern because ABS is certainly not indestructible. However, if you limit the movement of the slab with proper reinforcement, drainage system, and installation techniques, I believe the concrete should be more of a protection for the ABS than a destroyer. Time will tell though. Replacing the main 3″ ABS line in my net zero home would be a nightmare.
what type of roxul did you use for sub slab? comfort board 80? thanks
Yep
thanks. You have a great blog here. I am trying to build my own home net zero as well and the details you have here are incredibly helpful to me. thanks for you response. I found your site through GBA.